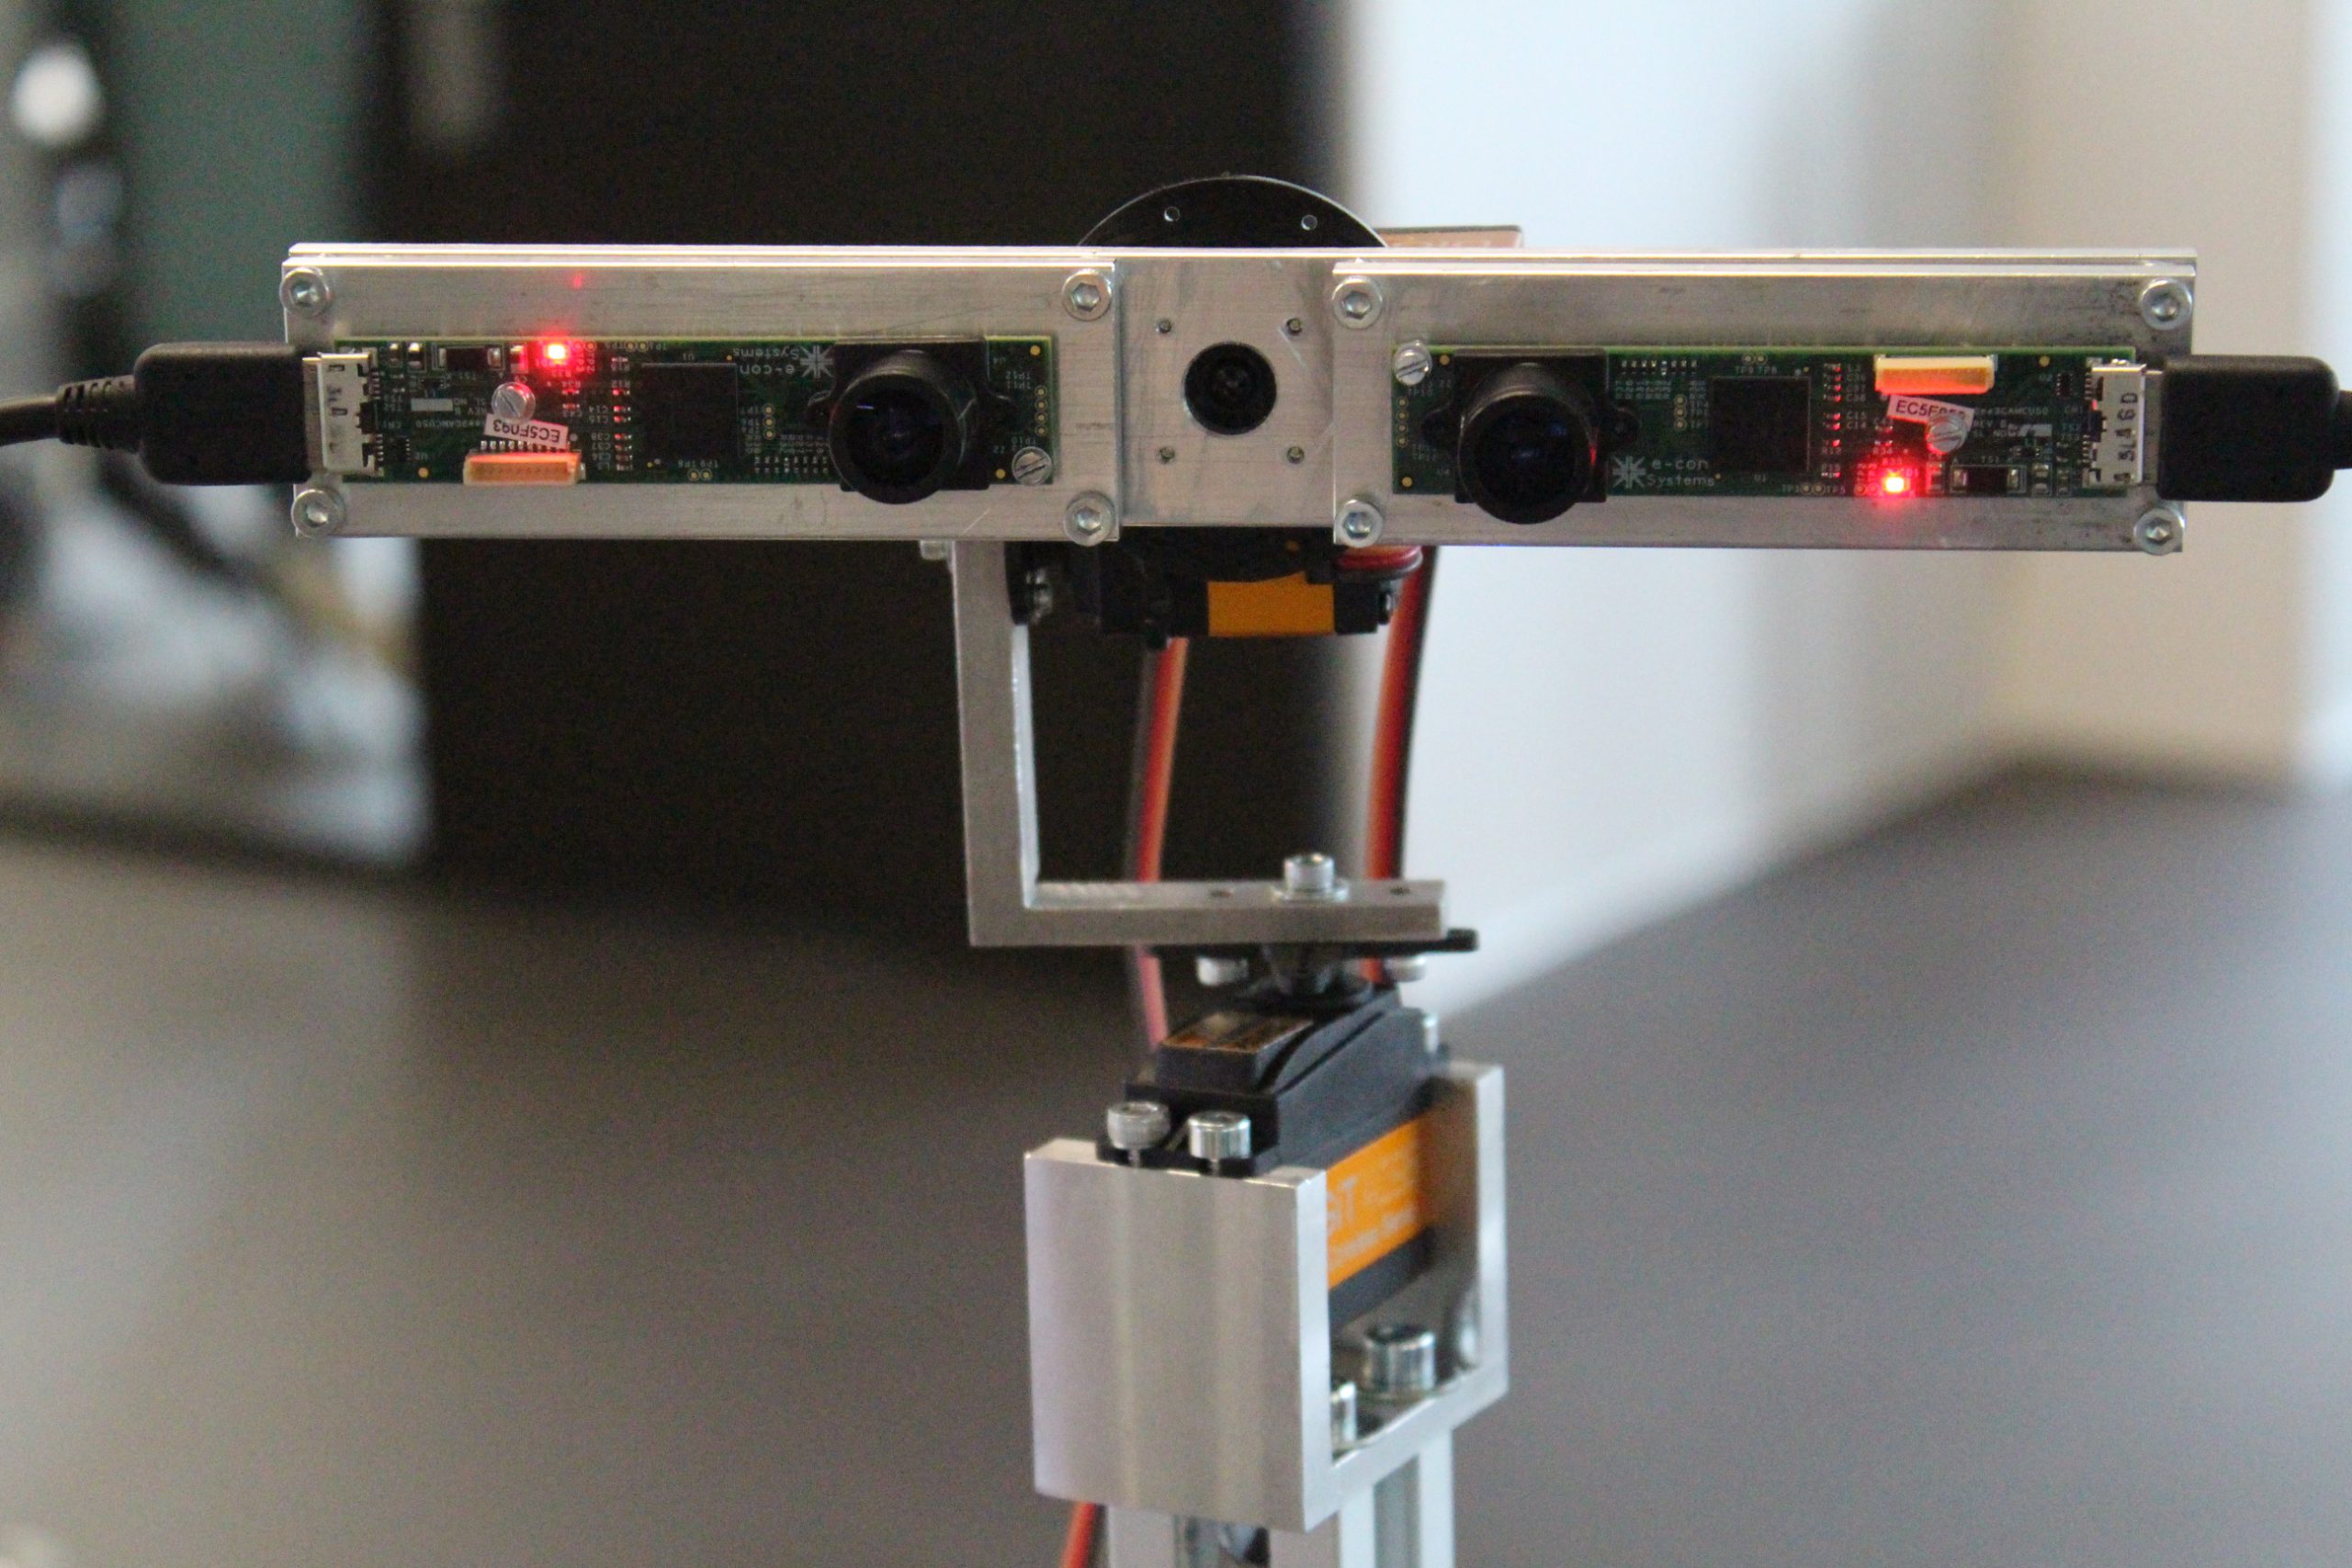
IRE – Stereo camera (Part 2 of 7)

IRE

Camera mount - frontIn order to match the Rift specifications as closely as possible, I had some very challenging requirements for cameras:

  • Stereo camera
  • Frame rate of 60 fps
  • Resolution at least 640×800 pixels (and for the Oculus Rift DK2 960×1080 pixels)
  • 90-degree field of view
  • Easily connectable to the onboard computer – probably USB
  • Affordable

Resolution IlustrationMost standard webcams, such as those made by Logitech, don’t have 60 fps. The famous PlayStation 3 Eye camera has that high frame rate, but only at 640×480 pixels. Most onboard cameras would have 60 fps, but they are difficult to connect because they don’t have USB. When I googled USB 3.0 cameras, I only found very expensive industrial cameras. Finally I discovered the trick of searching with YouTube. After a while I found the company called e-con Systems. They produce the camera See3CAMCU50. It features 60 fps at 1280×720 pixels over USB 3.0. Bingo! Additionally, any lens of a M12, or respectively S-Mount, can be installed. I went for two Lensation BT1922C lenses, which give me a field of view of about 90°.

As you probably already noticed, the resolution of the camera doesn’t match the resolution of the Oculus Rift. Regardless of which version of the Rift is used, either DK1 or DK2, some pixels are lost. Turning the camera 90 degrees does help to lose fewer pixels Canadian area code 779 , because then it has the resolution of 720×1280. The left image is an illustration of the different resolutions.

Camera mount

Camera mount - back

In order to get a stereo camera, the cameras are mounted on an aluminum plate. The lenses thereby have a separation of 65 mm, which is the average interpupillary distance in humans. The rig has the ability for tweaking the orientation of each camera to make sure that our brain can merge the two images into one stereo image.

See3CAMCU50

The See3CAMCU50 compresses the video stream with MJPEG in order to get 60fps. Of course the USB 3.0 connection isn’t the bottleneck, but the parallel interface connection from the chip to the USB controller is. This compression has some drawbacks. For example, the edges in the image are pixelated. Luckily the user won’t notice it very much, because the Rift DK1 is pixelated anyway. The bigger issue is the required CPU power to decompress the video stream. That’s the reason for choosing an onboard computer with an Intel i7. I should also mention that the cameras only work properly with Windows 7.

Today I wouldn’t choose the See3CAMCU50 anymore. I would probably go for the LI-USB30-M021X or the LI-USB30-M034WDR of Leopard Imaging Inc. They are more expensive, but the video stream isn’t compressed, so you could probably save some money on the computer.

My tests, however, have shown the importance of 60 fps. I also tried it with 30 and 40 fps with the Oculus Rift, but the results were horrible. The image is stuttering and you quickly get motion sick. In my opinion the high frame rate is vitally important to achieving a great experience.

The next article will cover the wireless video & audio transmission.

If you have any suggestions or questions, please use the comment form. I am always happy to learn something new.

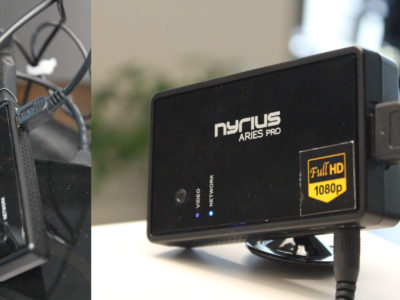
IRE – Video & audio transmission (Part 3 of 7)

IRE

How can I wirelessly transmit 1080p@60fps with short latency? That was one of my biggest questions. Most FPV systems are analog, which results in a bad image. That’s why I wanted to have a digital solution. First I thought of using Wifi, but soon I realized that it would have too much latency. Some people reported having over 150ms. After advices of Oculus VR the motion-to-photons latency (time from moving head to the matching image) should be under 20ms. So Wifi wasn’t an option. Perhaps it would be possible to get the latency down with a lot optimizations, but I didn’t have the time for that.

NyriusAriesPro

After searching for a while, I found the standard Wireless HDMI. Most of the systems work on 5.1 – 5.8 GHz. I decided to take the Nyrius Aries Pro Canadian area code 902 , because it promised reasonable range (~40 meters) with <1ms latency. In addition the transmitter can be powered over USB. Because the transceiver acts like an HDMI cable, it also transmits audio. The downside is that the final image has directly to be transmitted to the Rift, so the video procession part has to be done on the robot.

In order to not only move the vision to another place, I added a microphone to the onboard computer. This sends the input to the HDMI output. To get the audio to some headphones, I put an HDMI splitter between the receiver and the Rift. The HDMI splitter was then connected to a Samsung TV, into which the headphones were plugged. In addition, the public could also see what the Rift-wearer sees.

I am quite happy with Nyrius Aries Pro; it has a feasible range to cruise in the office. But for an immersive telepresence robot, it will be necessary to find a solution for transmitting the video stream over the internet.

The next article will cover the processing the live video of the stereo cam for the Oculus Rift and audio of the microphone.

If you have any suggestions or questions, please use the comment form. I am always happy to learn something new.